
One of the beautiful things about Christmas is how differently it’s celebrated by communities around the world. The food we make, the songs we sing, the decorations we hang – all are unique to our country and culture. Our Christmas crafts are different, too.
In Armenia, one family makes Christmas ornaments from yarn and balloons. In the Philippines, families construct colorful stars called parols and hang them around their homes. In the Dominican Republic, crafters transform felt paper into stunning expressions of flores de Pascua, or poinsettias.
Learn how to make these (and more) DIY Christmas crafts from around the world, below!
 Philippines: Christmas parol
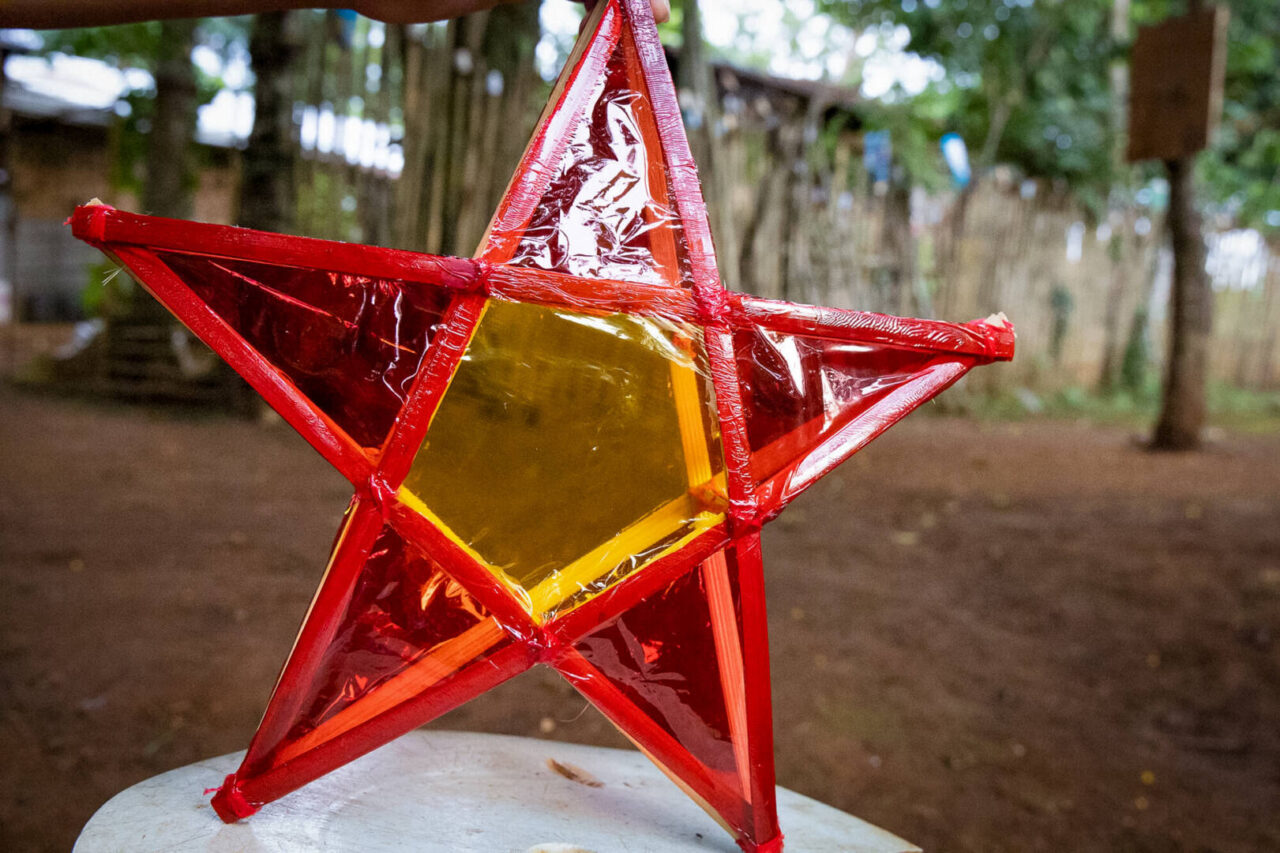 Philippines: Christmas parol
Supplies
- Bamboo craft sticks, called pllieay, available on Amazon
- Scissors
- String
- Rubber bands (or extra string)
- Hot glue gun
- Regular craft glue
- Tissue paper or clear plastic sheets
Instructions
- Prepare your sticks. For one star, you will need 10 long pllieay sticks (about 15 inches long), and five shorter sticks, about 2.5 inches long. You can make these by cutting up one of the longer sticks.
- Lay five long sticks in the shape of a five-pronged star. The sticks will overlap in the middle, creating a pentagon.
- Using string or rubber bands, tie each of the five tips of the star so that the sticks stay in place.
- Using a hot glue gun, glue the five corners of the inner pentagon where the sticks overlap.
- Repeat steps 2–4 to create a second matching star.
- Apply a blob of hot glue to each of the five tips of the pentagon on one of the stars. Take the five smaller sticks and stand them up in the blobs of glue, so that you have five pillars coming up from the points of the pentagon.
- Add a blob of hot glue to each of the five points of the pentagon on the second star.
- Take the second star and slowly lower it onto the five vertical sticks adhered to the first star, so that the two stars are parallel to one another and connected by the five vertical sticks in the middle.
- Once the glue has dried and the two stars feel securely attached to the 5 middle sticks, gently bend the tips of the two stars toward each other. The bamboo should have a little give to it. Tie the five tips of the top star to the five tips of the bottom star using string or rubber bands.
- Using craft glue, cover your star with colorful tissue paper or clear plastic. Trim excess as needed.
- Tie a string to one of the tips to hang up the star.


Armenia: Yarn ball ornaments
Supplies
- Cotton yarn
- Small balloons
- Liquid glue
- Water
- Glitter
- Ribbon
- Scissors
- Pin
- Disposable bowl
- Gloves (unless you don’t mind sticky fingers)
- Parchment paper
Instructions
- Blow up a balloon to about a 5-inch round ball.
- In a disposable bowl, add one spoonful of glue per ornament, and thin the glue slightly with water.
- Take a bundle of yarn and dip it into the glue, soaking it all over.
- Wrap the wet yarn all around the balloon, tucking the tip of the yarn under once you’ve reached the end.
- While the yarn is still wet, sprinkle glitter onto parchment paper and roll the ornament in it to add sparkle.
- Set aside to dry for a couple of hours.
- Once dry, pop the balloon with a pin and gently pull it out between the hard yarn threads, using tweezers if needed.
- Tie a ribbon loop to a thread of the ornament to hang it on a tree.
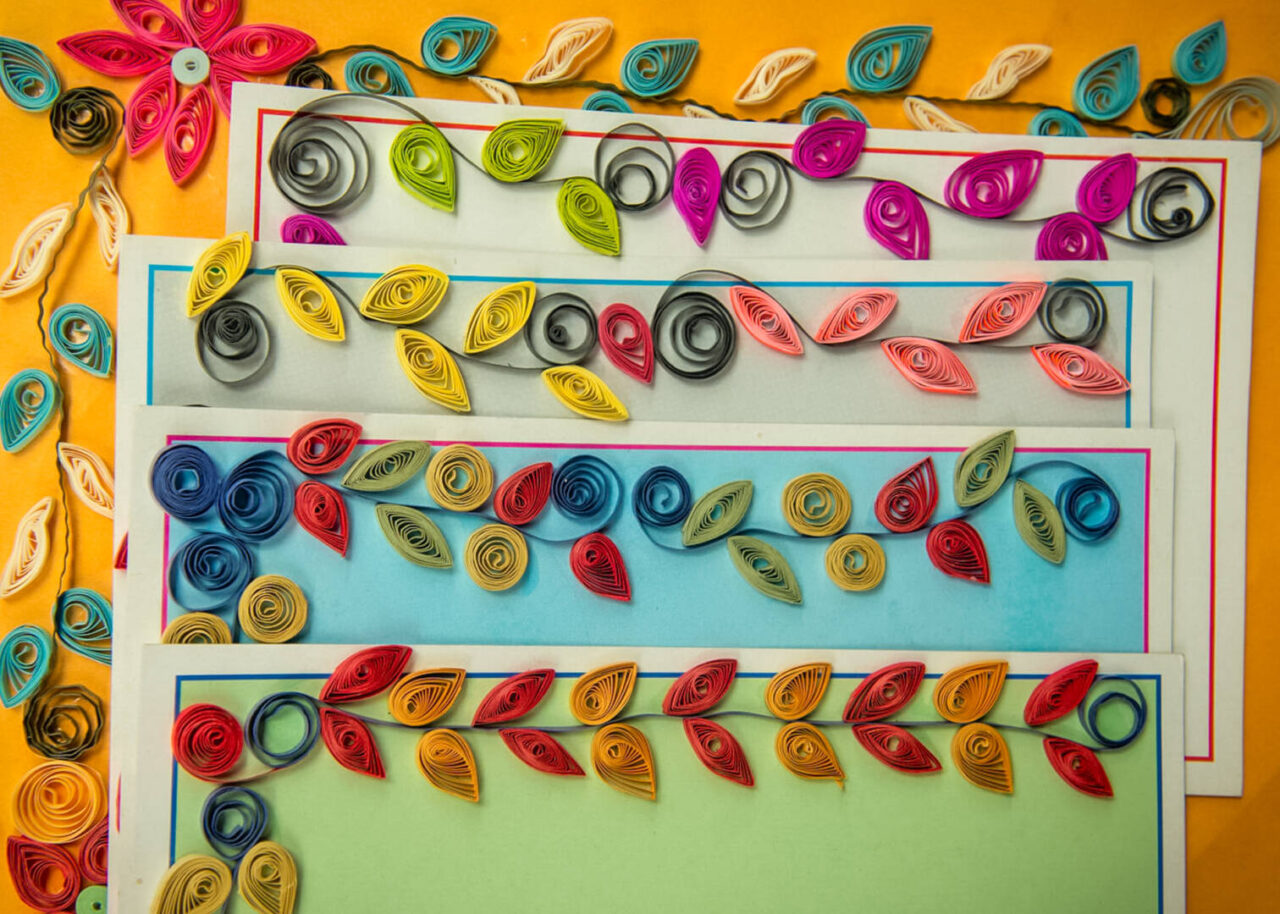
India: Quilled Christmas cards
Supplies
- Colorful sheets of craft paper
- Liquid glue from a bottle with a pointed tip
- Scissors
- Quilling needle (optional, but helpful)
Instructions
- Cut various colors of paper into strips, 10 to 12 inches long and ¼ inch wide.
- Roll the strips of paper into tight coils, until they look like miniature rolls of toilet paper.
- Allow the coils to loosen so that you can see space between the coils of paper. They do this automatically the moment you set them down. They will not uncoil fully.
- Apply a very small dot of glue to the end of the strip of paper and press it to the side of the coil. Do this to each coil you make.
- Either leave the coils as circles or create different shapes by pinching the sides. Pinching one side of the coil creates a teardrop shape. Pinching two opposite sides of a coil creates a leaf or petal shape. Pinching three or four sides of the coil creates diamonds, squares, or stars.
- Select a sheet of paper to use as a card. Fold and cut it to the size of your choosing.
- Decorate the card by gluing the colorful coils of paper to it. Get creative with your layout. Use long strips of paper and leaf-shaped coils to make a vine (see photo), arrange petals into a poinsettia, or lay a bunch of round coils down in a circle to create a Christmas wreath.
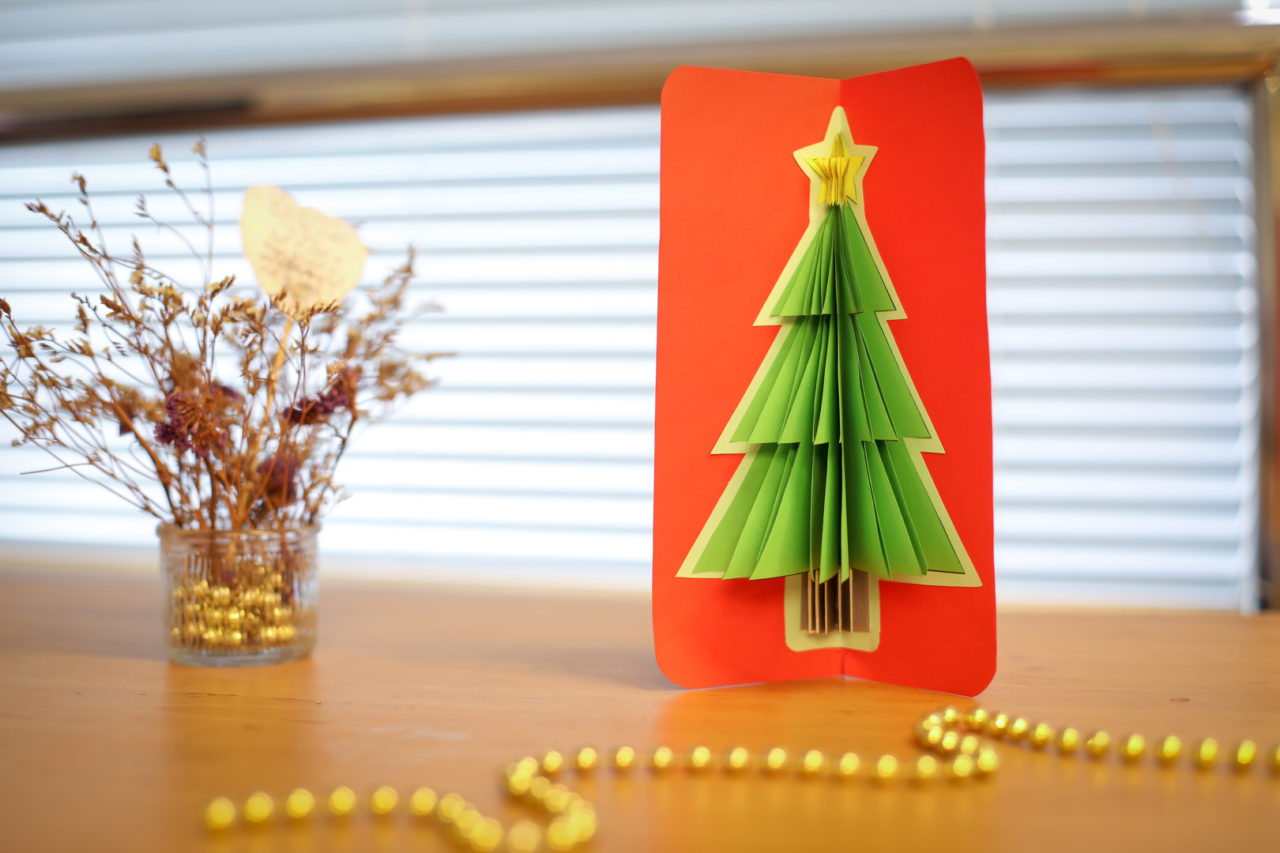
Cambodia: Pop-up Christmas tree cards
Supplies
- Colored construction paper: green, yellow, and brown
- Colorful cardstock paper
- Scissors
- Glue
- Stencils or templates to trace for Christmas trees, stars, and tree trunks
- Decorations of your choosing (glitter, stickers, paint, etc.)
Instructions
- Using stencils or templates, trace six identical Christmas trees, six stars, and six tree trunks on the green, yellow, and brown construction paper. Cut out each shape.
- On a new piece of construction paper, lay out a tree, star, and trunk to form the shape of a Christmas tree. Trace around the three pieces, leaving a quarter-inch margin all around (refer to the light-yellow paper behind the pop-up tree in the photo). Cut out the Christmas tree shape and set it aside.
- Cut a piece of cardstock paper into a square, large enough that it will be bigger than the pop-out Christmas tree. Since this will determine the size of your card, you can make it larger than pictured if you want more room to write a note around it.
- Carefully fold the trees, stars, trunks, cardstock paper, and Christmas tree shape from step 2 in half vertically.
- Take a folded tree and apply glue to one side. Take a second folded tree and lay it on top of the glue, carefully lining it up with the other tree. Repeat this step with each tree until all six are glued together. Set aside to dry.
- Repeat step 5 with the stars and trunks.
- Take the folded Christmas tree–shaped paper from step 2 and open it up. Apply glue to the back of the pop-up stars, trees, and trunks, and affix them to the seam of this paper, leaving a quarter-inch margin all around.
- Apply glue to the back of the Christmas tree–shaped paper and affix it to the seam of the cardstock paper.
- Once the glue has dried, carefully open your pop-up Christmas tree card. Add decorations and a note.


Dominican Republic: Flor de Pascua Christmas flowers
Supplies
- Two pieces of white paper to cut out petal stencils
- 8.5 x 11-inch sheets of felt (red or white)
- Scissors
- Hot glue gun
- Plastic pearls (red for white flowers or gold/silver/white for red flowers)
- Sewing pins
Instructions
- On a sheet of paper, draw a five-petal flower to create a stencil for the base of the flower. Also draw a single, separate petal shape, the same size as the five petals on the base.
- Cut the shapes out.
- Pin the paper flower base to a piece of felt and cut around the stencil.
- Pin the petal to the felt and cut around the stencil. Repeat four more times until you have five petals.
- Cut off one tip on each of the petals, creating a straight-edge base.
- Put a drop of hot glue on the base of the petals. Fold and pinch the base of each petal until it is fixed.
- Place all five petals on the felt flower base, with each of the pinched ends meeting in the middle, facing up. (The top petals should be positioned in between the petals on the bottom flower, so the points are evenly distributed.) Affix them to the base with hot glue.
- Apply a drop of glue at the center where the petals meet, and stick a few pearls to the glue.
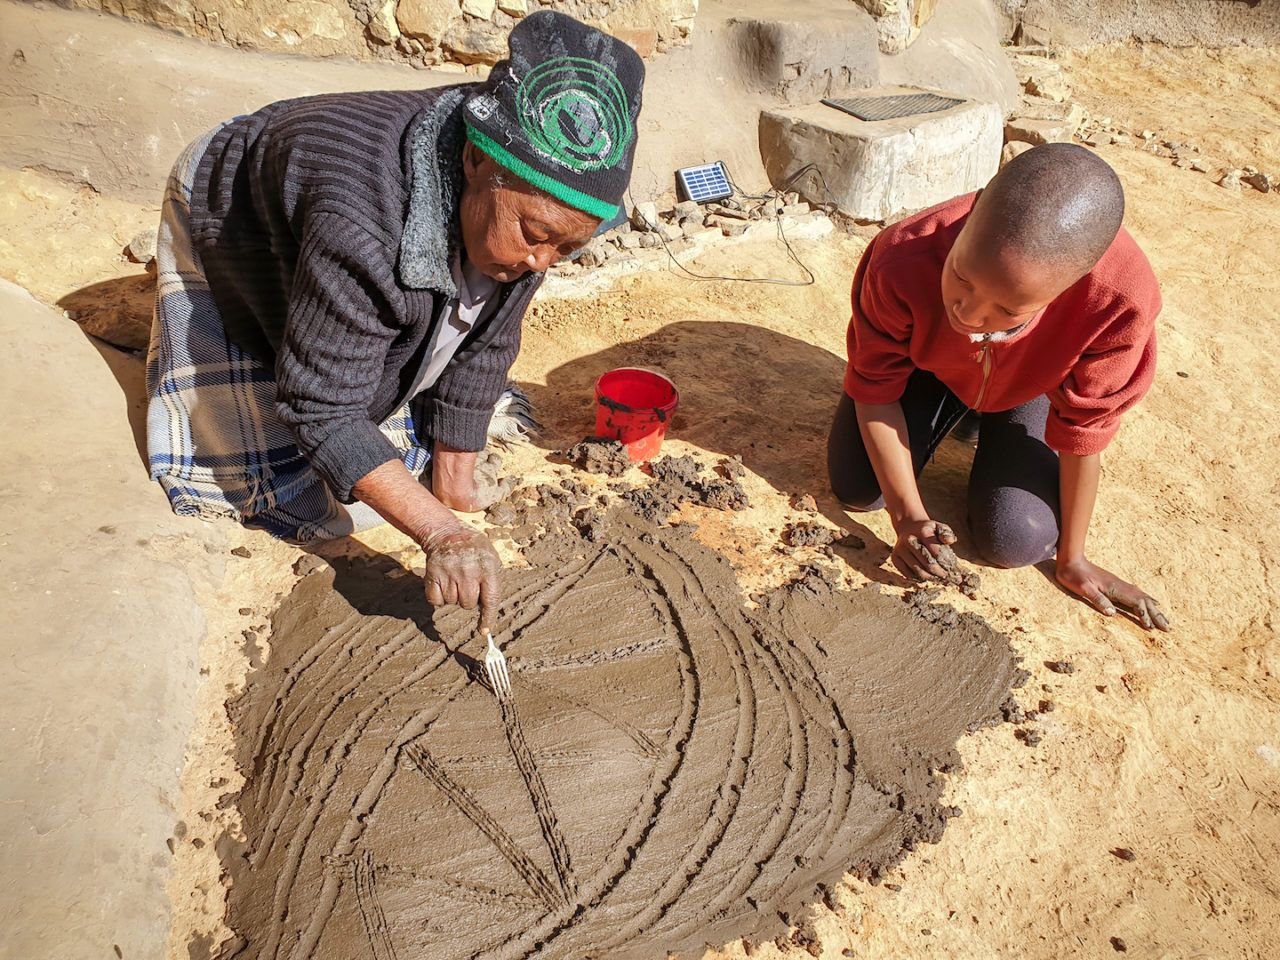
Lesotho: Paving the way for Jesus
As Christmas approaches, Christian families in rural areas of Lesotho clean and decorate their homes in honor of their Savior’s birth. Twelve-year-old Lieakae and her grandmother decorate mud outside the entrance of their house. It will dry into a beautiful new path to welcome Jesus into their hearts and home on Christmas day.
Lieakae’s grandmother uses soil, cow dung, and water to create this pathway. For a fun alternative, try using air-dry modeling clay to create decorative tiles or Christmas ornaments.
Supplies
- Air-dry modeling clay
- Decorating tools (we recommend toothpicks and plastic silverware if you don’t have pottery tools)
- Optional: cookie cutters, ribbon
Instructions
- Roll out a ball of clay on wax paper until it is about a half-inch thick.
- Cut off the edges to make a 6-by-6-inch square tile or could use cookie cutters to create Christmas ornaments. If you’re making ornaments, remember to poke a hole at the top for a ribbon.
- Using the decorating tools of your choice, apply your design.
- Set your creation in a safe place to dry for about 24 hours.
- If you made an ornament, thread your ribbon through the hole at the top and tie a loop so you can hang it.
World Vision staff members Jim Wungramyao Kasom in India, Gayane Galstyan in Armenia, Claudia Martinez Perez in the Dominican Republic, Chanthany Chea in Cambodia, ‘Makopano Semakale in Lesotho, and Lanelyn Carillo in the Philippines contributed to this article.